
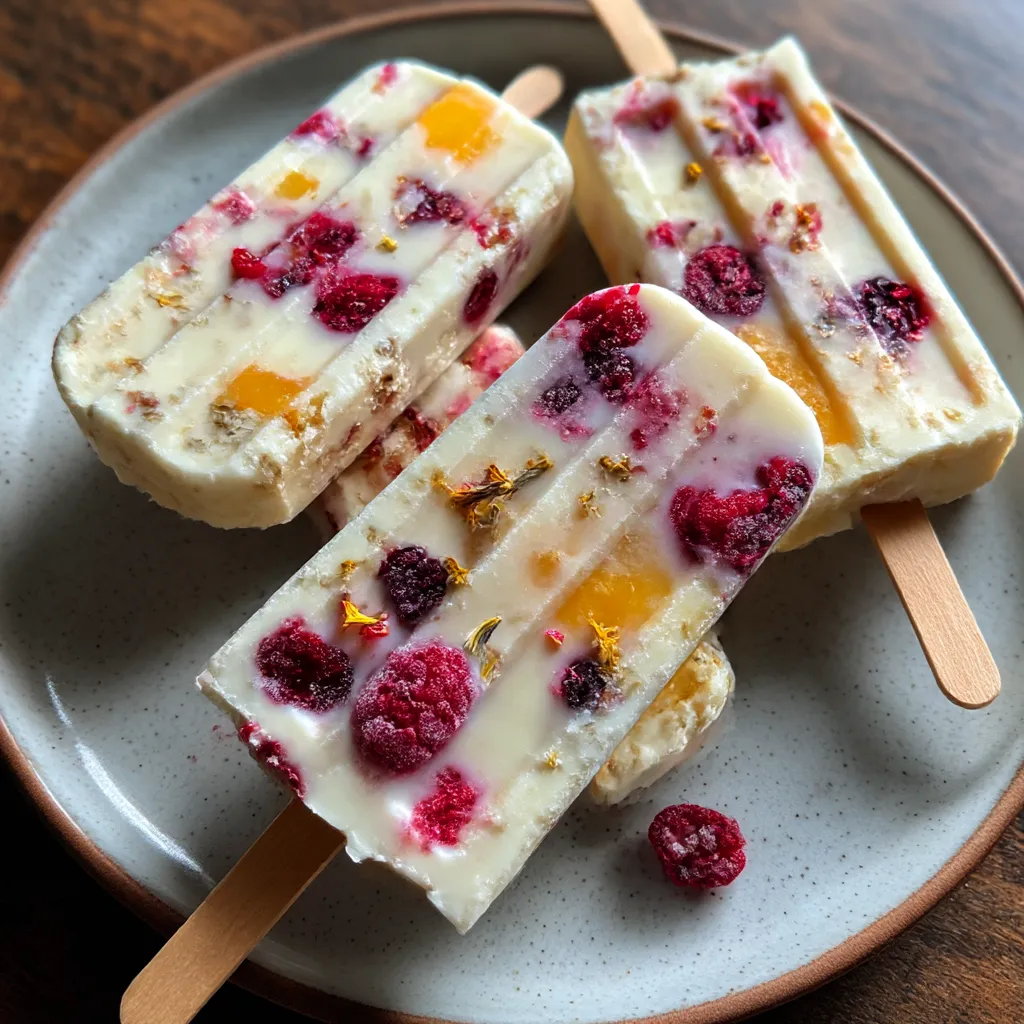
Fruity Yogurt Pops are the perfect way to cool off with layers of creamy Greek yogurt and bright fruit puree that burst with berry and banana flavor. These easy-to-make pops blend smooth Greek yogurt sweetness with tangy berry and banana notes, all kissed by honeyed vanilla. Whether you’re looking for a healthy frozen treat on a sunny afternoon or a guilt-free dessert that everyone will love, this beginner-friendly recipe will have you layering, freezing, and indulging in no time—get ready to make popsicle magic!
Key Ingredients
To whip up these Fruity Yogurt Pops, you only need a handful of wholesome ingredients that come together in layers of creamy tang and fruity freshness:
- 2 cups plain Greek yogurt: Creamy and tangy base that holds honey and vanilla for the smooth popsicle layers.
- 3 tablespoons honey: Natural sweetener that adds floral notes and balances the yogurt’s tang.
- 1 teaspoon vanilla extract: Enhances the flavor with warm, aromatic vanilla undertones.
- 1 cup mixed berries: Provides vibrant color and a punch of fruity, tart sweetness when pureed.
- 1 ripe banana: Adds natural sweetness and a silky texture to the fruit layer.
- ½ cup orange juice: Thins the fruit puree for easy blending and adds a citrusy brightness.
How To Make Fruity Yogurt Pops
Creating these pops is a fun, hands-on process of blending, layering, and freezing to achieve a beautifully swirled, refreshing treat. You’ll start by mixing the creamy yogurt base, then blend your fruit into a smooth puree before building your popsicle molds layer by layer. Once assembled, a few hours in the freezer and you’ll have vibrant popsicles ready to enjoy.
1. In a large mixing bowl, whisk together Greek yogurt, honey, and vanilla extract until the mixture is completely smooth and all ingredients are evenly combined.
2. Transfer the mixed berries, ripe banana, and orange juice into a blender and puree on high speed until the fruit mixture is well blended and silky.
3. Spoon a generous layer of the yogurt mixture into each popsicle mold, filling about one-third of the way up to create the first creamy layer.
4. Carefully pour or spoon a layer of the fruit puree over the yogurt, then continue alternating yogurt and fruit puree layers until each mold is filled, leaving a small gap at the top for expansion.
5. Insert popsicle sticks into the center of each mold, ensuring they stand upright, then place the molds in the freezer to freeze for at least four hours or until completely solid.
6. To unmold the pops, briefly run warm water over the outside of the molds for about 10–15 seconds, then gently pull on the sticks while twisting slightly to release each pop without breaking.
Serving Suggestions
Once your Fruity Yogurt Pops are ready, the fun really begins—here are four creative ways to serve them and amp up the presentation:
- Garnish with fresh berries on a platter: Arrange popsicles on a bed of mixed berries to echo the fruit layers inside.
- Drizzle with honey just before serving for an extra touch of sweetness.
- Serve alongside a small bowl of crushed nuts (like pistachios or almonds) for a crunchy contrast.
- Place pops on individual mini dessert plates with a sprig of mint for a café-style treat.
Tips For Perfect Fruity Yogurt Pops
These tips will help you get every layer just right and keep your popsicles from turning icy:
- Use full-fat Greek yogurt for creamier texture.
- Substitute maple syrup for honey to make them vegan.
- Experiment with different fruits like mango or peaches for variety.
- For a marbled effect, gently swirl yogurt and puree layers with a skewer.
How To Store It
Storing your popsicles correctly ensures they stay flavorful and free from freezer burn:
- Keep finished pops in an airtight container or resealable freezer bag to lock in freshness.
- Place a piece of wax or parchment paper between layers of pops to prevent sticking.
- Store at the back of the freezer, where temperature stays most consistent.
- Label the container with the date so you can enjoy them within two weeks for optimal taste.
Frequently Asked Questions
Here are answers to some common questions to help you master these pops:
- Q: How long does it take to prepare and freeze Fruity Yogurt Pops?
A: It takes about fifteen minutes to assemble the ingredients and layer the yogurt and fruit puree, followed by at least four hours of freezing time to ensure they are fully set.
- Q: Can I substitute other fruits for the mixed berries and banana?
A: You can experiment with fruits like mango, peaches, pineapple, or even a tropical blend; just puree them with orange juice in the same ratio and adjust sweetness if needed to maintain a smooth texture.
- Q: How can I make these pops vegan?
A: Replace the honey with maple syrup or agave and use a plant-based yogurt alternative such as coconut or almond yogurt, then follow the same layering and freezing steps for a fully vegan treat.
- Q: What type of yogurt yields the best texture?
A: Full-fat plain Greek yogurt provides the creamiest and richest base, but if you prefer lower fat you can use reduced-fat Greek yogurt or a thick dairy-free yogurt, keeping in mind that thinner yogurts may require a shorter freeze time to avoid iciness.
- Q: How do I achieve a marbled effect in the pops?
A: After spooning alternating layers of yogurt and fruit puree into the mold, gently run a thin skewer or toothpick through the layers in a zigzag motion to swirl the mixtures lightly before inserting sticks and freezing.
- Q: What is the best way to unmold the pops without breaking them?
A: Briefly hold the popsicle mold under warm running water for about ten to fifteen seconds, then firmly grasp the stick and gently tug while giving the mold a slight twist to release each pop smoothly.
- Q: How should I store extra pops for later enjoyment?
A: Keep the frozen pops in an airtight freezer-safe container or resealable bag to prevent freezer burn; they will stay fresh for up to two weeks and can be enjoyed straight from the freezer whenever you wish.
What Makes This Special
These Fruity Yogurt Pops truly stand out because they balance creamy Greek yogurt, honeyed vanilla, and bright fruit puree in every colorful layer—no two bites ever taste the same! They’re fun to make, customizable with your favorite fruits, and perfect for printing and tucking into your recipe binder for repeat summer enjoyment. Give them a try, then leave a comment or question below—whether you experimented with mango or mastered that marbled effect, we’d love to hear how your popsicle adventure turned out!
Print
Fruity Yogurt Pops
- Prep Time: 15 mins
- Total Time: 15 minutes
- Yield: 6 servings
- Category: Desserts
Description
These pops blend smooth Greek yogurt sweetness with tangy berry and banana puree. Each bite offers creamy texture, fruity freshness, and a hint of honeyed vanilla. Perfect icy treats for sunny afternoons.
Ingredients
- 2 cups plain Greek yogurt
- 3 tablespoons honey
- 1 teaspoon vanilla extract
- 1 cup mixed berries
- 1 ripe banana
- ½ cup orange juice
Instructions
- In a bowl combine Greek yogurt, honey, and vanilla extract until smooth.
- In a blender puree mixed berries and banana with orange juice until well blended.
- Spoon a layer of yogurt mixture into each popsicle mold.
- Add a layer of fruit puree over the yogurt, then alternate layers until molds are full.
- Insert popsicle sticks and freeze for at least 4 hours or until solid.
- To unmold, briefly run warm water over the outside of the molds and gently pull pops off.
Notes
- Use full-fat Greek yogurt for creamier texture.
- Substitute maple syrup for honey to make them vegan.
- Experiment with different fruits like mango or peaches for variety.
- For a marbled effect, gently swirl yogurt and puree layers with a skewer.