
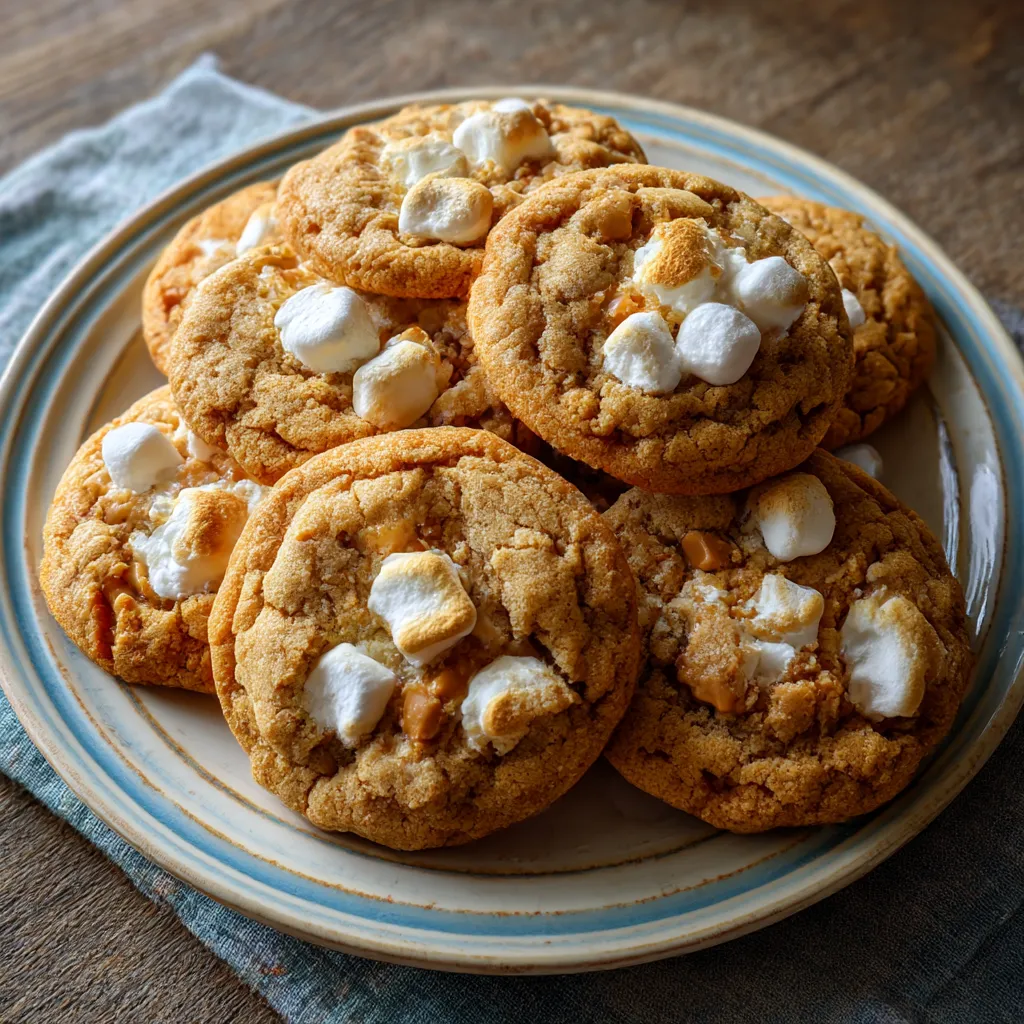
Baked Chewy Fluffernutter Cookies transform classic peanut butter cookies into a nostalgic delight with gooey marshmallow swirls. These soft, chewy treats balance rich peanut butter with pillowy marshmallow fluff, yielding a tender bite that’s ridiculously satisfying. Whether you’re craving a cozy dessert after dinner or planning to impress friends at your next gathering, these beginner-friendly cookies will quickly become a household favorite. Ready to whip up a batch? Let’s dive into every step and tip to bake them perfectly!
Key Ingredients
Before you start baking, gather these simple ingredients that come together to create the perfect chewy, sweet cookie:
- 1 cup unsalted butter, softened: Provides richness and moisture for a tender, chewy texture.
- 1 cup granulated sugar: Adds sweetness and helps cookies spread evenly.
- 1 cup packed brown sugar: Contributes deep, caramel-like flavor and extra chewiness.
- 1 cup creamy peanut butter: Delivers nutty richness and binds the dough together.
- 2 large eggs: Provide structure, richness, and help the dough rise slightly.
- 2 teaspoons vanilla extract: Enhances all the flavors with warm, aromatic notes.
- 3 cups all-purpose flour: Forms the base of the dough and gives cookies their shape.
- 1 teaspoon baking soda: Reacts with acids to lighten the texture and aid spreading.
- 1/2 teaspoon baking powder: Offers extra lift for soft, fluffy centers.
- 1/2 teaspoon salt: Balances sweetness and intensifies the peanut butter flavor.
- 1 cup marshmallow fluff: Creates those irresistible gooey swirls on top.
How To Make Baked Chewy Fluffernutter Cookies
Baking these cookies is as fun as eating them! You’ll start by creaming together sugars, butter, and peanut butter until light and airy, then gently fold in your dry ingredients to keep the dough tender. Once your dough is scooped and each ball gets a swirl of marshmallow fluff, you’ll bake just until the edges turn golden while the centers stay soft. Follow these steps carefully, and soon you’ll have a tray of perfect, chewy Fluffernutter cookies ready to enjoy.
1. Preheat the oven to 350°F and line a baking sheet with parchment paper to prevent sticking.
2. In a large bowl, cream the softened butter, granulated sugar, brown sugar, and peanut butter together until the mixture is light and fluffy, about 2–3 minutes.
3. Beat in the eggs one at a time, scraping down the bowl between additions, then stir in the vanilla extract until fully combined.
4. In a separate bowl, whisk together the all-purpose flour, baking soda, baking powder, and salt to ensure even distribution.
5. Gradually add the dry ingredients to the wet ingredients, mixing on low speed or folding by hand just until no streaks of flour remain.
6. Scoop tablespoon-sized portions of dough onto the prepared baking sheet, spacing them about 2 inches apart to allow for spreading.
7. Gently flatten each dough ball with the back of a spoon or your fingers, then top with about a teaspoon of marshmallow fluff.
8. Use a toothpick to lightly swirl the fluff into the top of each cookie, creating a marbled look without tearing the dough.
9. Bake for 10 to 12 minutes, or until the edges are lightly golden while the centers remain soft and slightly underbaked.
10. Allow cookies to cool on the baking sheet for 5 minutes before transferring them to a wire rack to cool completely and set.
Serving Suggestions
These Baked Chewy Fluffernutter Cookies shine in many situations—here are a few ways to present them and elevate your snack game:
- Fresh from the Oven: Serve them warm for that dreamy, gooey marshmallow pull—perfect with an oven mitt in one hand and a cookie in the other.
- With a Glass of Cold Milk: The classic pairing highlights the peanut butter notes and cools down the sweetness.
- Ice Cream Sandwiches: Sandwich a scoop of vanilla or chocolate ice cream between two cookies for an over-the-top frozen treat.
- Gift-Wrapped Treats: Stack a few in a clear cellophane bag tied with a ribbon for homemade edible gifts that everyone will love.
Tips For Perfect Baked Chewy Fluffernutter Cookies
No matter how experienced you are, these friendly tips will help you nail the texture and flavor every time. From timing tweaks to ingredient swaps, a few small adjustments can make a big difference!
- Reduce baking time by one minute for extra chewiness in the cookie centers.
- Store cookies in an airtight container at room temperature for up to four days to keep them soft.
- Use crunchy peanut butter instead of creamy for added texture and nutty pops in every bite.
- Freeze cookies between wax paper layers for up to two months, then thaw at room temperature before serving.
How To Store It
To keep your Baked Chewy Fluffernutter Cookies tasting just-baked for as long as possible, proper storage is key. Whether you plan to enjoy them over a few days or stash them for later, these methods will help maintain their flavor and chewiness:
- Airtight Container at Room Temperature: Once fully cooled, layer cookies in an airtight container with parchment paper to prevent sticking—store for up to four days.
- Freezing Baked Cookies: Place cooled cookies in a freezer-safe bag with wax paper between each layer; freeze for up to two months and thaw on the counter.
- Freezing Dough Balls: Flash-freeze scooped dough balls on a tray, then transfer to a freezer bag; bake from frozen, adding an extra minute or two to the bake time.
- Vacuum Sealing: If you have a vacuum sealer, remove excess air before sealing baked cookies or dough to preserve maximum freshness.
Frequently Asked Questions
Here are answers to some common questions so you can bake with confidence:
- Q: How long does it take to prepare and bake these cookies?
Total time is about 30 to 35 minutes: roughly 15 minutes for prep (creaming butter, sugars and peanut butter, mixing in flour, scooping and topping with fluff), 10 to 12 minutes of baking, followed by a 5-minute rest on the baking sheet and cooling on a wire rack.
- Q: How do I ensure the cookies come out chewy rather than crisp?
To maximize chewiness, reduce the bake time by one minute so the centers remain soft, use an equal ratio of brown to granulated sugar to retain moisture, and mix the dough only until the dry ingredients are just incorporated.
- Q: Can I use crunchy peanut butter instead of creamy?
Yes, substituting crunchy peanut butter adds pleasant texture. Make sure it’s fully softened at room temperature and stir a little longer when creaming to evenly distribute the peanut pieces.
- Q: What’s the proper technique for swirling in the marshmallow fluff?
After flattening each dough ball, drop about a teaspoon of fluff on top. Then gently drag a toothpick through the fluff in one or two circular motions—this creates a marbled effect without tearing the dough.
- Q: How should I store the baked cookies to keep them fresh?
Once completely cooled, layer the cookies between sheets of parchment paper in an airtight container at room temperature. They’ll stay chewy for up to four days.
- Q: Can I freeze either the unbaked dough or the baked cookies?
Yes. Flash-freeze scooped dough balls on a tray, then transfer them into a freezer-safe bag with wax paper between layers for up to two months. Baked cookies can be frozen the same way and thawed at room temperature before serving.
What Makes This Special
These Baked Chewy Fluffernutter Cookies bring childhood nostalgia straight to your cookie jar with that dreamy mash-up of peanut butter and marshmallow fluff. The tender dough, golden edges, and swirled fluff create a playful texture party in every bite—plus, they’re so easy even beginner bakers will feel like pros. Don’t forget to print this guide or bookmark it for your next baking session! If you give them a try, let me know how they turned out or drop any questions below—I’m here to help you bake the fluffiest, chewiest treats around.
Print
Baked Chewy Fluffernutter Cookies
- Prep Time: 15 mins
- Cook Time: 11 mins
- Total Time: 26 minutes
- Yield: 24 servings
- Category: Desserts
Description
These cookies balance rich peanut butter with pillowy marshmallow fluff, yielding a tender, chewy bite. Each swirl of fluff melts into golden edges while the centers stay soft, delivering a playful twist on a nostalgic favorite.
Ingredients
- 1 cup unsalted butter softened
- 1 cup granulated sugar
- 1 cup packed brown sugar
- 1 cup creamy peanut butter
- 2 large eggs
- 2 teaspoons vanilla extract
- 3 cups all-purpose flour
- 1 teaspoon baking soda
- 1/2 teaspoon baking powder
- 1/2 teaspoon salt
- 1 cup marshmallow fluff
Instructions
- Preheat oven to 350°F and line a baking sheet with parchment paper.
- In a large bowl cream butter sugar brown sugar and peanut butter until light and fluffy.
- Beat in eggs one at a time then stir in vanilla extract until combined.
- In a separate bowl whisk flour baking soda baking powder and salt.
- Gradually add dry ingredients to wet ingredients mixing until just combined.
- Scoop tablespoon-sized portions of dough onto prepared baking sheet spacing them about 2 inches apart.
- Gently flatten each dough ball and top with about a teaspoon of marshmallow fluff.
- Use a toothpick to lightly swirl the fluff into the top of each cookie.
- Bake for 10 to 12 minutes or until edges are lightly golden with centers still soft.
- Allow cookies to cool on the baking sheet for 5 minutes then transfer to a wire rack to cool completely.
Notes
- For extra chewiness reduce baking time by one minute.
- Store cookies in an airtight container at room temperature for up to four days.
- Use crunchy peanut butter for added texture.
- Cookies can be frozen between wax paper layers for up to two months.