
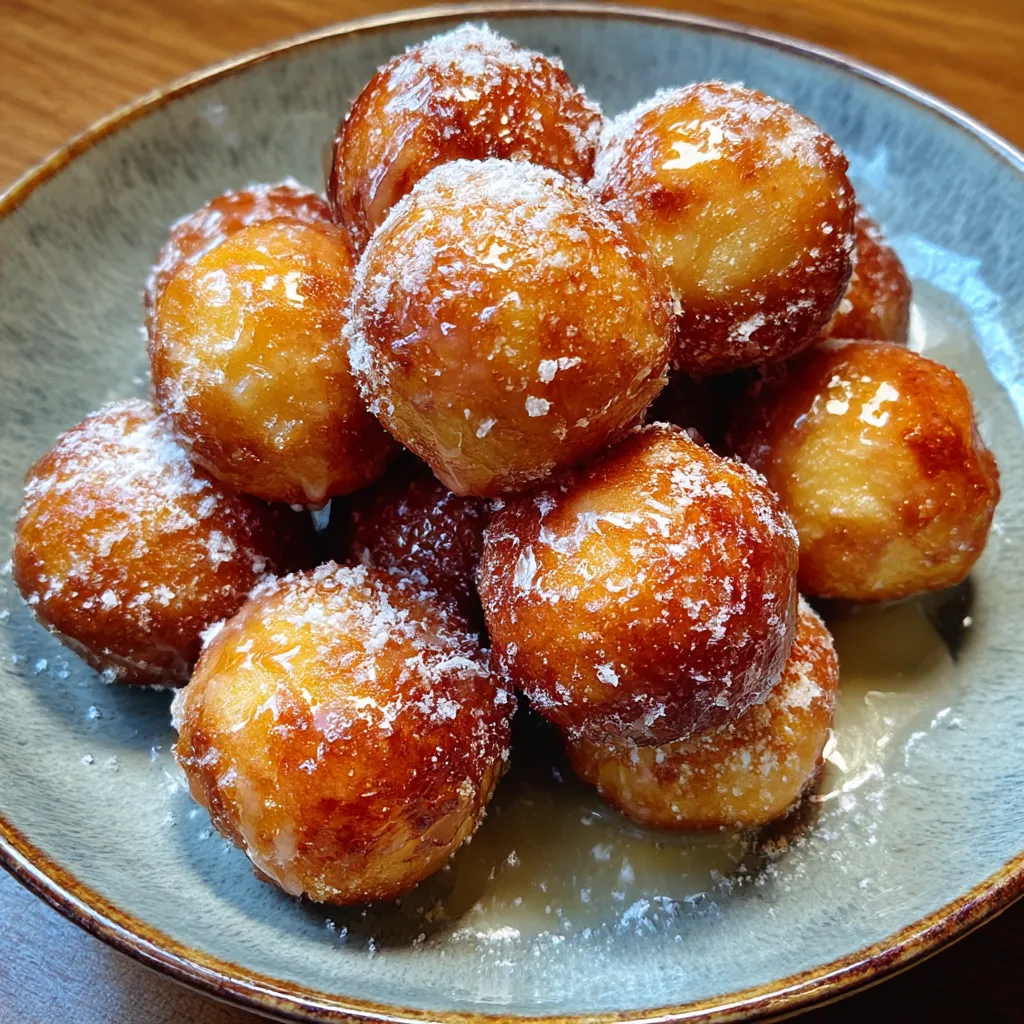
Have you ever tasted a bite-sized treat that’s crispy on the outside and delightfully pillowy on the inside? Glazed Donut Holes are golden-brown mini rings puffed to pillowy perfection, then dipped in a glossy vanilla glaze that cracks into sweet shards as you bite. With light, tender dough balls bubbling to a golden hue in hot oil and finishing with a silky powdered sugar coating, these little wonders are impossible to resist—perfect for breakfasts, snacks, or any time you need a touch of sweetness.
Key Ingredients
Let’s talk about the essentials that transform simple pantry staples into irresistible Glazed Donut Holes:
- 2 cups all-purpose flour: Provides structure and a tender crumb for each dough ball.
- 1/4 cup granulated sugar: Adds sweetness and helps achieve a golden crust.
- 2 teaspoons baking powder: Leavening agent that puffs the dough perfectly.
- 1/2 teaspoon salt: Balances flavor and enhances sweetness.
- 1/4 teaspoon ground nutmeg: Infuses a warm, aromatic hint into the dough.
- 1 large egg: Binds ingredients and contributes to a light texture.
- 2/3 cup milk: Hydrates the dough for that soft interior.
- 2 tablespoons unsalted butter, melted: Adds richness and tenderizes the dough.
- 2 quarts oil for frying: The medium that creates a crisp, golden exterior.
- 1 1/2 cups powdered sugar: Base for the sweet, crackling glaze.
- 3 tablespoons milk: Thins the powdered sugar into a smooth glaze.
- 1/2 teaspoon vanilla extract: Gives the glaze its classic vanilla aroma.
How To Make Glazed Donut Holes
Frying donut holes is easier than you think, and once you see how the simple dough transforms into golden clouds, you’ll never go back. In just a few steps you’ll whisk, beat, scoop, fry, and glaze your way to bite-sized bliss—no fancy equipment needed beyond a deep pot, a scoop, and a thermometer to keep that oil at the perfect temperature.
1. In a large bowl whisk together all-purpose flour, granulated sugar, baking powder, salt, and ground nutmeg until evenly combined.
2. In a separate bowl beat the egg, milk, and melted butter until just combined, taking care not to overmix.
3. Pour the wet ingredients into the dry ingredients and stir until the mixture is just moistened—small lumps are okay.
4. Heat oil in a deep pot or fryer to 350°F, making sure there’s enough oil to fully submerge the dough balls.
5. Use a small cookie scoop or two teaspoons to drop tablespoon-sized portions of dough into the hot oil, working in batches.
6. Fry the donut holes, turning occasionally for even browning, until they’re a deep golden color—about 2 to 3 minutes per batch.
7. Remove the donut holes with a slotted spoon and drain on paper towels to absorb excess oil.
8. While the donut holes cool slightly, whisk together powdered sugar, milk, and vanilla extract until the glaze is smooth and pourable.
9. Dip each warm donut hole into the glaze, then place them on a wire rack so the excess glaze can drip off cleanly.
Serving Suggestions
When these tender little dough balls are this good, you’ll want to serve them in style. Here are a few fun ideas to elevate your presentation and enjoyment:
- Serve them warm on a platter, dusted lightly with extra powdered sugar for a café-worthy display.
- Pair with a cup of coffee or tea, letting the heat revive the glaze’s shine and balance the sweetness.
- Add a sprinkle of colorful jimmies or chopped nuts on the glaze for a festive pop at parties.
- Create a donut hole bar, offering various glazes (chocolate, maple, berry) and toppings so everyone can customize their bite-sized treat.
Tips For Perfect Glazed Donut Holes
Getting these little treats just right is all about a few key techniques and timing. Keep your oil steady, your mixing gentle, and your glaze fluid to end up with those irresistible crackling shells as soon as you bite in. Here are some friendly pointers:
- Keep the oil temperature steady to ensure even frying and avoid greasy donut holes.
- Avoid overmixing the dough to maintain a light tender texture.
- Glaze will firm up quickly on the warm donut holes creating a thin sweet shell.
- Store any leftovers in an airtight container at room temperature for up to two days.
How To Store It
After all that frying and glazing, you’ll want to keep your donut holes fresh and tasty for later snacking. Here’s how to store these sweet bites so their texture and flavor stay on point:
- Airtight container at room temperature: Layer the donut holes between parchment paper to prevent sticking; enjoy within two days for best texture.
- Refrigeration: Seal in a tightly covered container for up to three days; allow to come to room temperature or briefly warm in a low oven before serving.
- Freezing: Place in a single layer on a baking sheet until firm, then transfer to a freezer bag; freeze up to one month and reheat at 325°F until warmed through.
- Reheating: Refresh stored donut holes in a 325°F oven for 5–7 minutes to crisp the exterior, then let cool slightly before glazing or adding fresh toppings.
Frequently Asked Questions
Here are answers to some common questions for home fryers tackling these bite-sized delights:
- Q: How long does it take to prepare and fry the glazed donut holes?
It takes about 10 minutes to mix the dry and wet ingredients and portion the dough, plus roughly 2 to 3 minutes per batch for frying. Allow an additional 5 minutes to whisk the glaze and dip the cooled donut holes. In total, plan for around 20 to 25 minutes from start to finish.
- Q: How can I prevent the donut holes from turning out greasy?
Maintain the oil temperature at a steady 350°F using a deep-fry thermometer. If the oil is too cool, the holes will absorb excess oil and become greasy; if it’s too hot, they’ll brown too quickly on the outside and remain undercooked inside. Drain the fried dough on paper towels immediately after cooking to remove any surface oil.
- Q: My dough sometimes comes out tough—how can I keep the donut holes light and tender?
To ensure a tender texture, stir the wet and dry ingredients until just moistened. Small lumps are okay; overmixing develops gluten in the flour and yields a dense, tough dough. Also, be sure to measure your flour accurately by spooning it into the measuring cup and leveling it off rather than scooping directly from the bag.
- Q: What adjustments can I make if the glaze is too thin or too thick?
If the glaze is too thin, add more powdered sugar a tablespoon at a time until it reaches a thicker consistency that will coat the donut holes without running off completely. If it’s too thick, whisk in a few drops of milk until the glaze is smooth and pourable. Work quickly, as the warm donut holes will set the glaze fast.
- Q: Can I prepare the dough or glaze ahead of time?
You can mix the dry ingredients up to a day in advance and cover tightly. Wait to combine the wet ingredients until you’re ready to fry. The glaze is best made just before dipping so it stays fluid; if you need to make it ahead, cover and refrigerate, then whisk in a touch of milk before use.
- Q: Is it possible to bake these donut holes instead of frying?
Baking will alter the traditional texture and appearance. If you prefer baking, place tablespoon-sized dough portions on a parchment-lined baking sheet, brush lightly with melted butter, and bake at 375°F for 10 to 12 minutes or until golden. Note that the exterior won’t be as crisp or evenly browned as with frying, but you can still dip them in the same glaze afterward.
- Q: How should I store leftovers, and how long will they stay fresh?
Store cooled, glazed donut holes in an airtight container at room temperature for up to two days. They are best consumed within the first day for optimal texture. If you need to keep them longer, freeze them in a single layer on a baking sheet until firm, then transfer to a freezer bag. Rewarm briefly in a 325°F oven before serving and refresh with a quick drizzle of glaze if desired.
What Makes This Special
What really sets these Glazed Donut Holes apart is the perfect balance between a crisp exterior and a pillow-soft interior, all topped with a smooth vanilla glaze that cracks just right. The simplicity of the ingredients and the quick frying-and-dipping process makes this recipe a weekend game-changer for home cooks. Print this out, save it for your next brunch or treat-yourself moment, and don’t be shy—drop a comment or question below if you try it or need a hand. Happy frying!
Print
Glazed Donut Holes
- Prep Time: 15 mins
- Cook Time: 12 mins
- Total Time: 27 minutes
- Yield: 6 servings
- Category: Desserts
Description
Light, tender dough balls bubble to a golden hue in hot oil, then get coated in a silky powdered sugar glaze that hardens just right—every bite offers a crisp exterior yielding to a soft, fluffy center.
Ingredients
- 2 cups all-purpose flour
- 1/4 cup granulated sugar
- 2 teaspoons baking powder
- 1/2 teaspoon salt
- 1/4 teaspoon ground nutmeg
- 1 large egg
- 2/3 cup milk
- 2 tablespoons unsalted butter melted
- 2 quarts oil for frying
- 1 1/2 cups powdered sugar
- 3 tablespoons milk
- 1/2 teaspoon vanilla extract
Instructions
- In a large bowl whisk together all-purpose flour granulated sugar baking powder salt and ground nutmeg.
- In a separate bowl beat the egg milk and melted butter until just combined.
- Pour the wet ingredients into the dry ingredients and stir until just moistened do not overmix.
- Heat oil in a deep pot or fryer to 350°F ensuring enough oil to fully submerge the dough.
- Use a small cookie scoop or two teaspoons to drop tablespoon-sized portions of dough into the hot oil.
- Fry the donut holes in batches turning occasionally until golden brown about 2 to 3 minutes per batch.
- Remove the donut holes with a slotted spoon and drain on paper towels.
- While the donut holes cool slightly whisk together powdered sugar milk and vanilla extract until smooth.
- Dip each warm donut hole into the glaze then place on a wire rack to allow excess to drip off.
Notes
- Keep the oil temperature steady to ensure even frying and avoid greasy donut holes.
- Avoid overmixing the dough to maintain a light tender texture.
- Glaze will firm up quickly on the warm donut holes creating a thin sweet shell.
- Store any leftovers in an airtight container at room temperature for up to two days.